Build a Flutter Login app with Python Backend
In today’s world, businesses need to make critical choices when it comes to selecting mobile technologies and they also need to test and assess these technologies daily. Organizations that are unable to produce easy-to-use products and services are at risk of falling behind their competition.
Over the last few years, various mobile frameworks, such as React Native, Xamarin and AngularJS, have been developed. These make it simpler to create digital experiences. More recently, a new player has entered the game: Google Flutter.
Then, when it comes to the backend, there is Python. This language makes the learning process easier and its readability means communication is smoother for programmers working on the same project. This also makes it easier for a different programmer working on later additions to understand and work with the original code.
In this article, we’ll show you how to connect a Python Django backend with a Flutter frontend using GraphQL.
Before we get started, let’s take a look at why we choose to use these tools.
Why we use Flutter
Flutter is a Google UI toolkit for building native apps for Android, iOS, PC and the web from a single codebase in record time. Flutter uses Dart as its programming language, a modern alternative to Javascript developed by Google. This OOP language is optimized for UI, fast on all platforms and similar to JavaScript with elements of Java. Flutter helps you develop faster, includes countless widgets, is open-source and portable, and has a great set of testing and debugging tools to optimize your app.
Why we use GraphQ
According to its website, “GraphQL is a query language for APIs and a runtime for fulfilling those queries with your existing data. GraphQL provides a complete and understandable description of the data in your API, gives clients the power to ask for exactly what they need and nothing more, makes it easier to evolve APIs over time, and enables powerful developer tools.”
There are many advantages to using GraphQL. To start with, it creates a uniform API across an entire application without being limited by a specific storage engine. Moreover, GraphQL APIs leverage your existing data and GraphQL engines are available in many languages. Finally, GraphQL calls the functions you provide for each field in the type system with optimal concurrency.
Why we use Python
![]()
There has long been a debate on which is the best backend language. Is it Swift? Or Java? Maybe C++? Well, although our programmers have an extensive toolkit that prepares them to tackle the most challenging problems, we do have a favorite. Python increases productivity, is platform-independent and easy to read, is great for machine learning, and has countless resources and a large community behind it.
Why we use Django
Django is an open-source Python web framework that has been gaining a lot of popularity lately. It has been used extensively by companies such as Mozilla, Spotify and NASA, as well as within our team. Django is not only fast, secure and versatile: it’s also great for SEO, highly-scalable and portable.
Now, let’s get into our app. Here are the steps you should follow:
1. Start a new Django Project
Create the virtual env & Activate it
mkvirtualenv graphql-auth
Create the Django Project
pip install django

django-admin startproject auth

cd auth
Create the custom user model
python manage.py startapp users
Then, create the custom user model:
Link: script
Add it to the settings
Link: script
Finally, migrate
python manage.py makemigrations

python manage.py migrate
2. Setup Graphene and GraphQL JWT
Install Graphene
pip install graphene-django django-graphql-jwt==0.3.0
Add the url
Link: script
Edit your settings
Link: script
Install Django-GraphQL-Auth
pip install django-graphql-auth
Link: script
Run it:
python manage.py migrate
Setup Email Backend
The default configuration is to send an activation email when registering users; you can set this to False on your settings, but you still need an email backend for resetting passwords.
The quickest solution for development is to set up a console email backend. To do this, simply add the following to your settings.py.
EMAIL_BACKEND ='django.core.mail.backends.console.EmailBackend'
Query: Create the schema
Create a file called schema.py next to your settings.py with the following lines:
Link: script
And add Django-Filter to the installed apps.
pip install django-filter
# auth.settings.py
Link: script
Making your first query
Start the dev server:
python manage.py runserver
Open your browser:
http://127.0.0.1:8000/graphql
On your GRAPHQL_JWT[“JWT_ALLOW_ANY_CLASSES”] setting, add the following:
Link: script
Let’s try to register a new user:
Link: script
Something went wrong! Now you know the response format that you can expect of all mutations
Let’s try again, this time, with a super-secret password:
Link: script
Check if the new user is really on the database:
Link: script
Congratulations! You have successfully built your very first authentication system with GraphQL! Now, let’s create a beautiful frontend for it!
3. Create the Flutter login app
flutter create auth_frontend

cd auth_frontend

flutter run -d chrome
The first time you use it, you’ll see a simple app where you can press a button to increase a counter.
For this tutorial, we have prepared a login example:
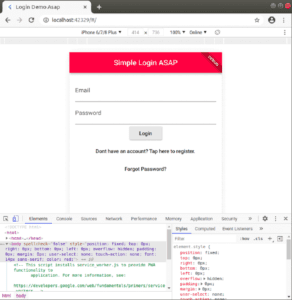
So far, we have just made the following changes to our main.dart:
Link: script
As you can see, a method is called when you press “register”, or “login”. Those are the functions we will implement with a simple backend call.
4. SetUp GraphQL in Flutter login
GraphQL has many benefits, both for the client (devices will need fewer requests and, therefore, reduce data usage) and the programmer (requests are arguable, they have the same structure as the request).
Installation
First, add the following packages to your project’s dependencies: pubspec.yaml
dependencies:

graphql_flutter: ^3.0.0
Then, create a graphQL configuration file where you will set up the backend URL, and create the GraphQLClient object.
Link: script
You will need another file to place your GraphQL queries:
Link: script
Then, modify your main.dart file to talk to the backend in Register.
First, import the necessary packages:
Link: script
Then, create the configuration objects in main:
Link: script
In the _LoginpageState class, add the following:
Link: script
Then, make the _createAccountPressed method async and add this code:
Link: script
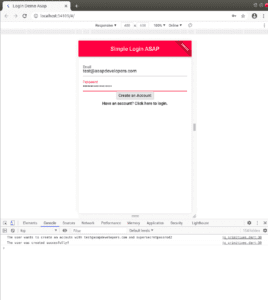
Now, be sure your backend is running as it should, and try to register with a new account in your frontend server. You may see this beautiful error:

Blocked by CORS policy. This happens because your backend does not accept requests from Flutter. There are many fixes for this, and it will depend on which environment you are deploying. For production, you should whitelist your frontend URL in the Django settings. But, for now, we will fix this in settings.py by allowing all CORS:
pip install django-cors-headers
Link: script
Finally, try to register a new user again and, if you enter a valid email, you should see a success message in the console!
Congratulations! You have built a complete web app, with both a frontend and backend! Go ahead and build something amazing!
And, here is the entire project for you to download: https://github.com/JoaquinAcuna97/Flutter-Django-Login
Final thoughts on Flutter login
Adding a widget with Flutter is really simple thanks to the official docs and you can find many widgets to add to your app. These include Appbars, icons, images, inputs, and animations, among many others. This, combined with the possibility to connect any backend services, including the potential of Django, is something that can bring a lot of value to your products, and keep your whole dev team happy!