In this article, we’ll discuss React Navigation for React Native, which is used to easily provide navigation functionalities to your mobile application. After a small introduction and overview of some common navigation types, we’ll be setting up a sample project with different examples of navigation, provided through GitHub gists.
Before we begin with React Navigation
Keep in mind that this article will serve as a general overview and introduction to React Navigation. For more information or advanced subjects, please review the official documentation here.
Minimum requirements
At the moment of publication, React Navigation 6 is the latest version and the one that we’ll be using. React Navigation 6 requires at least react-native@0.63.0. If you’re using Expo, your SDK version should be at least 41.
What is React Navigation?
React Navigation is an open-source, extensible and easy-to-use library used to implement navigation functionalities in a mobile application under React Native (or Expo!). It’s based on JavaScript, so it’s fully customizable and comes out of the box with basic components for common navigation requirements on both iOS and Android, such as tabbed, stack or drawer navigation components, all with a great look and feel.
Now that we have an overview of what React Navigation is, let’s expand a bit on why you should use it.
Why use React Navigation?
- It’s very easy to get started with React Nav, especially for the basics.
- The documentation provided for the library is great and exhaustive and includes both beginner-friendly documentation and more advanced guides.
- It’s constantly being updated with features and fixes, which is a sign of a healthy solution.
- It’s the most used library for navigation in React Native, so the community is extensive and very helpful. It’s even recommended as a navigation solution in the official React Native Docs!
- It provides an extensive set of features (which is constantly growing) and basic components for the most common implementation scenarios.
- Being an extensible open-source solution built on JavaScript means that you’ll be able to modify anything you wish if you have a custom or advanced requirement, as long as you know the language.
Note: As the official docs mention, “If you’d like to achieve a native look and feel on both Android and iOS, or you’re integrating React Native into an app that already manages navigation natively, the following library provides native navigation on both platforms: https://github.com/wix/react-native-navigation.” This alternative library will not be covered in this guide.
Common navigation types explained
Here’s a quick introduction to the most common navigation types:
Stack
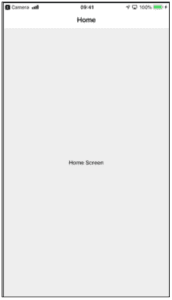
When a user taps on a link on the screen, a new screen is stacked on top of the current one. In the eyes of the user, the screen is “replaced”, and the user will only see the new one. By default, this screen contains a navigation bar on top, as well as the content area. Both can be customized.
Tabbed
The user can navigate through different screens using controls at the top or bottom of the screen. The tabs remain visible at all times. In the example below, the tabs can be seen at the bottom.
Drawer
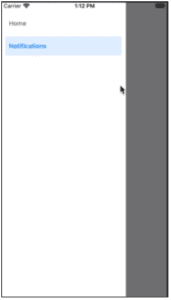
A slide-out side drawer is used to navigate to different screens. The example below shows an open navigation drawer (which is triggered by swiping from left to right).
How to use it
To show how to use React Navigation, we’ll create a small proof of concept (POC), which illustrates an implementation of stack navigation, tabbed navigation and drawer navigation. The POC will simply show a welcome screen containing a button with the text “Say Hi!”, which, when pressed, will redirect the user to another screen and show a greeting message.
Let’s get started!
Installation
Before installing React Navigation, you’ll need a React Native project created and ready to go. To do this as simply as possible and for the purpose of this proof of concept, we’ll use the Create React Native App utility by following the instructions in this GitHub link.
Here’s an example using npm: npx create-react-native-app react-native-nav
Note: npx simply runs the script once with npm without installing. If you wish to install it globally and use it any time, you can use npm i -g create-react-native-app and, then, simply create-react-native-app appname.
After readying our React Native app, we have to install React Navigation in it. The installation process varies if you’re using Expo or React Native and there are some caveats here and there, so please follow the official installation instructions found here.
At the end of the installation process, you should have an entry file (usually app.js or index.js) with an enclosing NavigationContainer tag as seen here:
Github Gist: script
Now, let’s see some very basic examples of each navigation type. Each navigation type requires its own dependencies, which you can install by following the guide.
Stack navigation example
First, let’s expand on the most basic example: stack navigation. To create a stack nav, simply use the auxiliary function imported from the react-navigation/stack package to create the navigator and set the corresponding screens inside, as seen below:
Github Gist: script
The screens themselves have a component prop, which must be set to React components. These components will receive a navigation prop, which exposes several utilities, such as those used to navigate to other screens. You can also pass other settings using the options prop, which can be used to set a title, as seen in the previous example.
Below, you can see example React components for the screens, as well as navigating between them (as seen on the OnPress of the “Say Hi!” button in the WelcomeScreen) and passing parameters (as seen in the message output in the GreetingScreen). These can be imported into the App.js file for usage, or directly pasted inside it.
Github Gist: script
Note: You can also go back to the previous screen by using navigation.goBack().
Note 2: Don’t forget to import or paste the React screen components (Welcome and Greeting) in App.js if using this example, otherwise the app won’t work. Note that this isn’t shown in the gist.
Drawer navigation example
Following the same example, this is how a minor code sample of drawer navigation would look like:
Github Gist: script
You can find more info on drawers here.
Tabbed navigation example
Following the same example, this is how a minor code sample of tabbed navigation (at the bottom of the screen) would look like:
Github Gist: script
You can find more info on tabs here.
Final thoughts on React Navigation
This article should have served as an introduction to React Navigation and a quick overview of different types of simple navigations and their implementation. You should aim to use the one that is most appropriate to your project/design, while facilitating the user’s experience throughout the app.
Keep in mind the note on why (and when) to use React Navigation (vs. alternatives like react-native-navigation) and always be sure to check out the official documentation to expand on the subject as well as review how to implement advanced features if required.
Happy coding!


